Sanitary treatment of the patient when identifying pediculosis
Sanitary treatment of the patient when identifying pediculosis
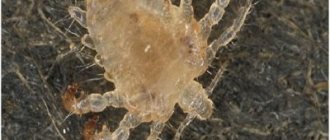
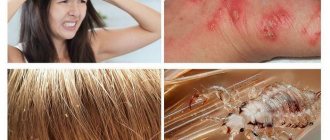
Purpose: destruction of lice and nits on the scalp (prevention of typhus).
Equipment:
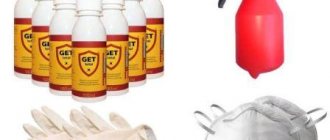
1. Packing protective clothing and linen in a pack - medical gown, headscarf, mask, oilcloth apron, gloves. Polyethyl kerchiefs - 2 pcs., oilcloth webbing, 2 towels, cotton swabs, rod, shampoo, 6% vinegar solution, heated to 30o C, oilcloth bag, scissors, fine-toothed comb.
2. Basin for burning hair, matches.
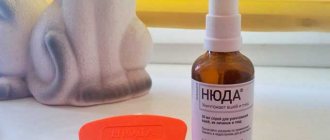
3. One of the disinsecticidal (pediculocidal) solutions: 20% benzyl benzoate solution or nittifor; 0.5% solution of methyl acetophos in equal quantities with 6% acetic acid, 0.25 solution of dicresyl.
4. Clean underwear.
5. Patient's medical history or outpatient card and lice examination log. 6. Emergency notification of an infectious disease.
Mandatory conditions: observe contraindications. These include treatment of pregnant and nursing mothers, children under 5 years of age, and patients with scalp disease.
Carry out the treatment in a special, well-ventilated room.
Respect patient rights, confidentiality, infection safety.
Preparation for the procedure:
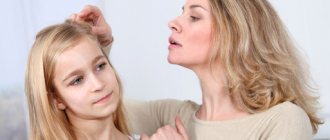
1. Inform the patient about the presence of head lice and obtain consent for treatment.
2. Put on an additional robe, headscarf, slippers, gloves, mask, apron.
3. Place the patient on a couch covered with oilcloth.
4. Cover the patient’s shoulders with an oilcloth drape.
Execution of the procedure.
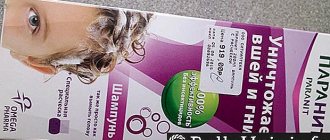
1. Treat your hair with one of the disinfectant solutions according to the instructions for the product (for example, wet your hair and rub in a 20% benzyl benzoate emulsion and leave for 3 minutes, or nittifor for 40 minutes).
2. Cover the patient’s hair with a plastic scarf and tie it with a towel (20 min.).
3. Rinse your hair with warm water, then with detergent, and dry with a towel.
4. Treat the patient’s hair with heated 6% table vinegar.
5. Cover your hair with plastic. with a scarf, tie with a towel for 20 minutes.
6. Rinse your hair with warm running water and dry with a towel.
7. Comb your hair with a fine-toothed comb, tilting your head over white paper, sequentially dividing the hair into strands and combing each strand.
8. Examine the patient's hair again. Make sure there are no lice or nits.
End of the procedure:
1. Burn the paper.
2. Remove and fold the patient’s underwear and clothing, and the nurse’s overalls into an oilcloth bag.
3. Send the bag to the disinfection chamber, treat the comb by wiping with 70% alcohol or pour over boiling water, and treat the room with an insecticidal agent.
4. Make a note on the title page of the patient’s medical history (P+).
5. Send an emergency notification about an infectious disease to the SES, register the fact of detection of lice at the patient’s place of residence.
6. Repeat the examination of the scalp after 7 days. If necessary, carry out sanitization.
Note: Make sure that the product does not get into the patient’s eyes and that the hair is evenly moistened. If it is necessary to cut the hair, it is done above the pelvis and the hair is burned.
Hygienic bath technique.
Goal: prevention of nosocomial infection.
Equipment: thermometers (room and water), scissors, towel, soap and washcloth (individual), clean underwear and bed linen, oilcloth apron.
Mandatory conditions: Avoid drafts, mandatory nurse supervision, air temperature in the bathroom at least 25 o, rubber mat on the floor, water temperature 36-37 o.
Bath preparation:
Wash the bath thoroughly with a brush, soap and paste, and treat with a disinfectant solution. Rinse off with cold and hot water.
Preparing a bath.
1. Fill the bathtub 1/2 full with water. First pour cold water, then hot (to avoid the accumulation of vapors in the room).
2. Warn the patient about possible unpleasant sensations (palpitations, shortness of breath, etc.) and the need to inform the medical professional about this.
3. Place the patient in the bathtub, supporting him from behind under the elbows so that his legs rest against the stand and the water level reaches the xiphoid process of the patient’s sternum.
4. Offer the patient to wash himself if he can do it himself.
Execution of the procedure . 1. Put on an apron.
2. Wash the patient (if he cannot do this on his own) in the following sequence: head, torso, upper limbs, lower limbs, groin area, perineum, using an individual washcloth and shower.
3. Help the patient get out of the bath.
End of the procedure:
1. Cover the patient’s shoulders with a towel and help the mind to leave the bath (if necessary, together).
2. Dry the patient in the same sequence.
3. Make sure that the skin in natural folds and between the fingers is dry.
4. Trim the patient's fingernails and toenails.
5. Help the patient comb his hair, put on clothes and shoes.
6. Dress the patient in clean linen.
7. Disinfect used care items, bath.
Note: Bath duration is no more than 25 minutes.
Helping the patient: If the patient complains of weakness, dizziness, palpitations while taking a bath, stop the bath!!!! Give him a cotton swab soaked in ammonia to smell and put him to bed. Call a doctor, further measures as prescribed by the doctor.
The bath is contraindicated: In case of myocardial infarction, acute vascular insufficiency, severe forms of tuberculosis, and certain skin diseases.
Hygienic shower.
Goal: prevention of nosocomial infection.
Equipment: thermometers (room and water), scissors, towel, soap and washcloth (individual), clean underwear and bed linen, oilcloth apron, diaper.
Mandatory conditions: Avoid drafts, mandatory nurse supervision, air temperature in the bathroom at least 25 o, rubber mat on the floor, water temperature 36-37 o.
Preparation for the procedure:
1. Explain to the patient the course of the upcoming procedure and obtain his consent.
2. Place a stool in the bath and seat the patient on it. 3. Help the patient get into the bathtub, supporting him from behind with his elbows, and then sit down on the seat. 4. Encourage the patient to wash himself. (offer help if necessary).
Performing the procedure:
1. Put on an apron and wash the patient’s hair:
— fold the diaper several times and ask the patient to close his eyes;
-wet your hair by pouring water from the shower on it;
-apply a little shampoo to the patient’s hair;
- wash your hair with both hands, gently massage your head until all your hair is completely soaped;
- wash off the soap suds with water;
- dry the patient's hair.
2. Help the patient, if necessary, wash the body in the same sequence as during a hygienic bath.
3. Help the patient get up from the seat (if necessary, together).
End of the procedure:
1. Help the patient get out of the bath.
2. Wipe the body in the same sequence.
3.Cut fingernails and toenails if necessary.
4. Help the patient comb his hair and put on clean underwear.
5. Remove the apron and throw it into a waterproof bag, wash and dry your hands.
6. Make a record of the procedure performed and the patient’s reaction.
Drying the patient.
Goal: prevention of nosocomial infection.
Preparation for the procedure:
1. Explain to the patient the course of the upcoming procedure and obtain his consent.
Equipment: screen, soap, mitten, towel, sheet, oilcloth.
The patient's position is lying on an oilcloth.
Performing the procedure:
The patient's position is lying on an oilcloth.
1.Isolate the patient with a screen and put on gloves.
2. Place an oilcloth under the patient, prepare a basin with water 35-37o
3. Wipe part of the body with a mitten moistened with soap and water, wet the mitten and wipe again. Wipe dry with a towel and cover with a sheet or blanket.
Processing sequence:
Neck, chest, arms, stomach, back, lower limbs, groin area, perineum.
4. Remove the oilcloth, screen, and remove gloves.
5. Make sure the patient is comfortable.
Change of underwear.
Underwear is changed regularly once every 7-10 days. In some cases, due to contamination.
Purpose: To provide assistance to a patient with an injured arm.
Equipment: Clean underwear, gloves, oilcloth bag for dirty linen, disinfectant solution.
Performing the procedure:
1. Raise the patient’s head and shoulders and help him sit up. Support the patient as necessary. Grab the edges of the shirt.
2. Carefully roll the shirt towards your head.
3. If possible, raise both the patient’s arms and remove the rolled-up shirt over the head.
4. After this, release the patient’s hands.
5. If the patient has one arm injured, then first we remove it from the healthy arm, then from the sick one. 6. Put on in reverse order.
Change of bed linen.
The patient is allowed to turn on his side.
Longitudinal method.
Equipment: set of clean linen (pillowcase, sheet, duvet cover, oilcloth, diaper); gloves, oilskin bag for used linen.
Changing bed linen requires a certain skill from the staff. Changing a sheet, with all the dexterity of the caregivers, inevitably causes great concern to the patient, so sometimes it is more expedient to shift the patient to another place and remake the bed.
Performing the procedure:
1. Roll a clean sheet up to half its length.
2. Remove the pillow from under your head.
3. Move the patient to the edge of the bed, turn him on his side. Roll the dirty sheet towards the patient.
4. Spread a clean sheet on the vacant part of the bed.
5. Carefully turn the patient onto his back, and then onto the other side, so that he is on a clean sheet.
6. Remove the dirty sheet.
7. Straighten out a clean sheet and tuck the edges under the mattress.
Transverse method.
1. Roll a clean sheet into a roll in the transverse direction.
2. Remove the pillow by carefully lifting the patient's upper body.
3. From the head end of the bed, roll up a dirty sheet under the patient to the lower back.
4. On the vacant part of the bed, roll out and straighten a clean sheet.
5. Place a pillow on a clean sheet and lower the patient’s head onto it.
6. Lifting the patient’s pelvis and legs, remove the dirty sheet, while continuing to straighten the clean one.
7. Tuck the edges of a clean sheet under the mattress.
When changing bed linen, make sure that there are no seams, scars, or folds on the sheets.
End of the procedure. 1. Remove gloves and place them in a container for disinfection.
2. Wash and dry your hands.
3. Make sure the patient is lying comfortably.
Note: If there are drainage pipes, make sure they are not kinked. If the patient's skin is heavily contaminated (with secretions, blood), wet wipe the skin.
Vessel delivery.
Equipment: vessel, 2 marked oilcloths - “for ships” and “backing oilcloth”, diaper, screen, toilet paper, 2 pairs of gloves, regulated disinfectant solution in containers, marked: “disinfection of gloves”, “disinfection of oilcloths”, “disinfection of vessels” "
Performing the procedure:
1. At the patient’s request, ensure a comfortable position in bed.
2. Place a cloth with a diaper under the patient’s pelvis.
3. Rinse the vessel with warm water and leave a small amount of water in it.
4. Separate the patient with a screen (if necessary).
5. Ask the patient to bend his knees or help him do so.
6. Place your left hand under the sacrum, helping the patient lift the pelvis. With your right hand, move the vessel under the patient’s pelvis so that the perineum is above the opening of the vessel.
7. Make sure that the surface of the vessel in contact with the skin is dry.
8. Cover the patient with a blanket or sheet and leave him alone.
9. Remove gloves, discard in disinfectant solution.
10. After the patient has emptied his bladder or bowels, put on gloves.
11. Remove the vessel, cover it with oilcloth, and place it in a specially designated place (or next to the bed).
12. Place the patient in a comfortable position and cover with a blanket.
13. Take out the oilcloths, the vessel, pour the contents of the vessel into the sewer, rinse, immerse in a disinfectant solution.
14. Wash the patient, dry the perineum.
15. Remove the diaper and diaper, straighten the bed linen.
16. Remove gloves and place them in a container for disinfection.
17. Wash and dry your hands.
Supply of urine bag.
Equipment: Clean, warm urine bag, oilcloth, gauze cloth, screen.
Performing the procedure:
1. Place a screen by the bed.
2. Throw back the blanket, ask the patient to bend his knees and spread his hips (if he is not able to do it himself, then help).
3. Take a gauze napkin in your left hand, wrap it around the patient’s penis, take the urinal bag in your right hand.
4. Insert the penis into the opening of the urinal, place it between the patient’s legs, and remove the gauze pad.
5. Cover the patient with a blanket and leave him alone.
6. After emptying the bladder, remove the urinal, oilcloth, cover the patient, remove the screen.
7. Pour the contents of the urinal into the drain, rinse, and immerse in a disinfectant solution.
8. Wash and dry your hands.
Washing women.
Target. Maintain personal hygiene, prevent ascending infection.
Equipment. Sterile: tray, forceps, napkins, oilcloth, diaper, soap, vessel, Esmarch jug or mug with water (water temperature 35-38o), gloves.
Preparation for the procedure:
1. Establish a friendly relationship (if the patient can perform the procedure on her own, invite her to do it).
2. Place an oilcloth and a diaper under the patient’s pelvis.
3. Ask the patient to bend his knees or help him do so.
4. Place your left hand under the sacrum, helping the patient raise the pelvis. With your right hand, move the vessel under the patient’s pelvis so that the perineum is above the opening of the vessel.
5. Make sure that the surface of the vessel in contact with the skin is dry.
6. Prepare a soap solution (make shavings from a piece of laundry soap, beat the foam in water).
7. Take the rubber tube from Esmarch’s mug or a jug in your left hand, and the forceps with a gauze cloth soaked in a soapy solution in your right hand.
Performing the procedure:
1. treat the external genitalia and perineum in the following sequence: pubic area, external genitalia, perineum, anal area. (It is necessary to change the wipes in the same sequence as the treatment. (Throw used wipes into the disinfection tray).
2. Spread the labia with one hand and wash one labia, change the napkins.
3. Wash the perineum in the direction from the pubis to the anus.
4. Rinse the patient’s perineum in the same sequence as washing. (Wipe the skin dry in the same sequence and direction, changing napkins).
5. Wash, rinse and thoroughly dry the patient’s perineum and anal area.
End of the procedure.
1. Remove the vessel, oilcloth, and remove gloves.
2. Straighten the bed linen and cover the patient.
3. Wash and dry your hands.
Washing men.
Preparation for the procedure: the same as for a woman.
Execution of the procedure.
1. Take the penis with one hand and move the foreskin.
2. Wash the head of the penis in a circular motion in the direction from the urethra to the pubic area and dry. (It is necessary to change napkins as consistently as the treatment).
3. Return the foreskin to its natural position.
4. Carefully treat, rinse and dry the rest of the penis, the skin of the scrotum, and anus.
End of the procedure: the same as for a woman.
Nail cutting.
Target. Maintain personal hygiene.
Equipment. Gloves, water container, liquid soap, hand and foot cream, scissors, tweezers, nail file, nail brush, tray, towel.
Execution of the procedure.
1. Treat hands hygienically and dry. Wear gloves. Ask the patient to lower the hand for 2-3 minutes. In a tray with warm water, add a little liquid soap to the water.
2. Remove your little finger from the water, dry it and carefully trim the nail.
3. Remove your fingers from the water one at a time, wipe and carefully trim your nails. When one thumb remains in the water, place the patient's second hand in the water. Repeat the procedure with the second brush.
4. Treat your nails with a nail file and a soft brush. Apply the cream to the patient's hands.
5. When completing the treatment of fingernails, place the patient’s foot in a basin with a warm soapy solution for 3-5 minutes.
6. Remove the patient's foot from the water and dry it and place it on a diaper or towel. Place the other foot in a bowl of water for this time.
7. Trim your nails with special tweezers, being especially careful in the corners of the nail.
8. Treat your nails with a nail file and brush. Apply the cream to the patient's feet.
9. Treat the patient’s nails on the second leg in the same way.
10. Remove the basin, pour the contents down the drain, put a towel in a bag for dirty laundry, remove gloves, disinfect the tools. Remove gloves, place them in a container for disinfection, and wash your hands.
Shaving.
The patient should be shaved as needed.
Equipment. Water container, compress cloth, towel, safety razor, shaving cream. All items must be for individual use by the patient.
Execution of the procedure.
1. Treat hands hygienically and dry. Wear gloves.
2. Help the patient take a “half-sitting” position.
3. Wet a large napkin with hot water (40-45o), wring it out and place it on the patient’s face, leaving him the opportunity to breathe.
4. Apply shaving cream to the patient's skin. Using the fingers of one hand, stretch the skin of the face, and with the other, shave with straight movements from the chin to the cheeks.
5. After shaving, pat your face with a damp cloth, then dry.
6. Wash and put away care items in the patient’s bedside table.
7. Remove gloves, place them in a container for disinfection, and wash your hands.
Oral care.
After each meal, rinse your mouth with salted water (¼ tsp salt per 1 glass of water).
Help a patient on bed rest brush his teeth 2 times a day (morning and evening).
Target. Prevention of the development of inflammatory and putrefactive processes in the oral cavity.
Equipment. Sterile: trays, 2 tweezers, napkins, 2 spatulas, pear-shaped can or Janet syringe, beaker. Vaseline, furacillin 0.1%, 1% solution of brilliant green. Towel, glass of water, tray for used material, container with disinfectant solution.
Preparing for the procedure.
1. Treat hands hygienically and dry.
2. Place the patient lying on his back, turning his head to the side. Cover the neck and chest with oilcloth, a towel, and place a tray under the chin.
3. Ask the patient to close his teeth (remove dentures, if any). Pour one of the prepared solutions into a beaker.
4. Move the patient’s cheek with a spatula and use tweezers with a gauze ball soaked in an antiseptic solution to brush the teeth, starting with the back teeth, and sequentially clean the inner, upper and outer surfaces of the teeth, moving up and down (from the gums) in the direction from the back to front teeth. Repeat the same steps on the other side of the mouth. The procedure is repeated at least two times. (Processing begins from the molars to the incisors, on the left, then on the right in the same sequence, changing the gauze balls).
5. Treat the tongue of a seriously ill patient: Ask the patient to stick out his tongue; if he cannot do this, then take the tip of the tongue with your left hand with a sterile gauze napkin and pull it out of the mouth.
6. Wrap a sterile spatula in a sterile napkin and moisten it in an antiseptic solution.
7. Use this spatula to remove plaque from the tongue in the direction from the root of the tongue to the tip.
8. Irrigate the patient's mouth or help rinse the patient's mouth.
9. Take sterile tweezers with a napkin and treat the palate, inner surfaces of the cheeks, gums, and the area under the tongue. (You need to change the napkin every time it becomes covered with mucus or sticky saliva).
10. Drop the tweezers into the tray.
11. Help the patient rinse his mouth or irrigate using a pear-shaped can: pull back the corner of the mouth with a spatula and alternately rinse the left and then the right cheek space with a stream of solution under moderate pressure.
End of the procedure.
1. Wipe the skin around the mouth with a dry cloth, lubricate your lips with Vaseline. (If there are cracks, treat with a 1% solution of brilliant green).
2. Clean dentures, if any, and help the patient put them on. (Clean with a toothbrush and toothpaste, holding it over the sink.
3. Disinfect instruments and gauze wipes.
4. Remove gloves, place them in a container for disinfection, and wash your hands.
Note: If the patient is unconscious, then wrap a napkin around the index finger, holding it with your thumb, fix it securely and moisten it in an antiseptic solution. We place a spatula or mouth opener between the teeth. Treat the palate, the inner surface of the cheeks, teeth, gums, tongue and the space under the tongue, then lips. (Change napkins as they become contaminated with mucus, plaque, and sticky saliva).
Eye care.
Indications. The patient's serious condition.
Equipment. Sterile: tray, tweezers, gauze balls, 0.02% furacillin solution, petroleum jelly, saline solution, pipettes, gloves, containers with disinfectant solutions.
Preparation for the procedure.
1. Establish a trusting relationship with the patient (or his relatives).
2. Explain to the patient the purpose of the procedure and obtain his consent.
3. Wash and dry your hands and put on gloves.
4. Pour Vaseline oil into one beaker and into another - furacillin solution.
5. Using tweezers, moisten the ball in Vaseline oil, lightly squeezing it against the walls of the beaker.
Executing the procedure.
1. Take the ball in your right hand and wipe one eyelid in the direction from the outer corner of the eye to the inner.
2. Rub the eyelid with a dry ball in the same direction.
3. Moisten the ball in the furacillin solution in the same way and repeat wiping in the same direction. Repeat rubbing 4-5 times with different balls.
4. in the presence of purulent discharge in the corners of the eyes: rinse the conjunctival cavity with saline solution, spreading the eyelids with the index and thumb of the left hand, and irrigate the conjunctival sac with the right hand using a pipette.
5. Rub the eyelid with a dry ball in the same direction.
6. Treat the second eye in the same way.
Completion of the procedure. Place the used balls, tweezers, beakers, pipettes in a container with a disinfectant solution. Remove gloves, place them in a container for disinfection, and wash your hands.
Nose care.
Target. Prevention of nasal breathing disorders.
Indications. The patient's condition is serious, there is discharge from the nasal cavity.
Equipment. Sterile: tray. Beaker, tweezers, Vaseline oil, cotton pads. Gloves. Tray, container with disinfectant solution.
Preparing for the procedure.
1. Establish a trusting relationship with the patient (or his relatives).
2. Explain to the patient the purpose of the procedure and obtain his consent.
3. Wash and dry your hands and put on gloves.
4. Pour sterile Vaseline oil into one beaker.
5. Take the turunda with tweezers, moisten it in Vaseline oil, and squeeze it lightly.
Execution of the procedure. 1. Transfer the turunda to your right hand and insert it into the nasal passage with rotational movements for 1-3 minutes, lifting the tip of the patient’s nose with your left hand.
2. Remove the turunda from the nasal passage with rotational movements. 3. treat the other nasal passage in the same way.
Completion of the procedure. Place the used turundas, tweezers, and beaker in a container with a disinfectant solution. Remove gloves, place them in a container for disinfection, and wash your hands.
Note. Do not use sharp care items.
Ear care.
Target. Prevention of hearing loss due to wax accumulation.
Indications. The patient is in serious condition and is on bed rest.
Contraindications. Inflammatory processes in the auricle, external auditory canal.
Equipment. Sterile: tray, tweezers, beaker, cotton pads, gloves. 3% hydrogen peroxide solution, tray, container with disinfectant solutions.
Preparing for the procedure.
1. Establish a trusting relationship with the patient (or his relatives).
2. Explain to the patient the purpose of the procedure and obtain his consent.
3. Wash and dry your hands and put on gloves.
4. Pour a 3% hydrogen peroxide solution into a sterile beaker.
5. Prepare a container with soap solution.
Execution of the procedure.
1. Moisten a napkin in a soapy solution and wipe the auricle, dry with a dry napkin.
2. Take a cotton swab with tweezers and moisten it in a 3% hydrogen peroxide solution.
3. put the turunda in your right hand, pull back the auricle with your left hand, so as to align the ear canal.
4. Insert the turunda with rotational movements into the external auditory canal to a depth of no more than 1 cm for 2-3 minutes.
5. Remove the turunda using rotational movements from the external auditory canal.
6. Treat the other ear canal in the same way.
Completion of the procedure.
Place the used turundas, tweezers, and beaker in a container with a disinfectant solution. Remove gloves, place them in a container for disinfection, and wash your hands.
Note. Do not use sharp care items.
Prevention of bedsores.
Bedsores are deep lesions of the skin and soft tissues up to their necrosis as a result of prolonged compression. Predisposing factors include disorders of local blood circulation, innervation and tissue nutrition.
Three main factors leading to the formation of bedsores have been established:
- Pressure – tissue compression occurs under the influence of its own weight.
- “Shearing force” - destruction and mechanical damage to tissues is caused by displacement of tissues relative to the supporting surface.
- Friction is a component of the “shearing” force; it causes detachment of the stratum corneum of the skin and leads to ulceration of its surface.
Signs of bedsores : the appearance of pale areas of the skin, then a bluish-red color without clear boundaries, then the epidermis peels off and blisters form. Next, tissue necrosis occurs, spreading deep into the tissue and to the sides.
Diet 0
Prescribed : after surgery on the digestive organs, with traumatic brain injury, cerebrovascular accident.
Target:
· Provide nutrition in conditions where eating regular food is impossible, difficult or contraindicated.
· Maximum unloading and sparing of the digestive organs, preventing intestinal bloating.
Characteristics: the most mechanically and chemically gentle nutrition (liquid, semi-liquid, jelly-like, pureed food). Table salt is sharply limited. Eat small meals every 2 hours.
Assortment : tea with sugar, fruit and berry jelly, jelly, rose hip decoction with sugar, weak meat broth, rice water.
Excludes: whole milk, cream, sour cream, grape juice, carbonated drinks, dishes with a dense consistency.
Diet 1
Prescribed for gastric ulcer or duodenal ulcer (hereinafter referred to as 12 PCs) during the recovery period after a sharp exacerbation and for mild exacerbation; mild exacerbation of chronic gastritis with preserved or increased secretion; acute gastritis during the recovery period.
Target:
- Moderate chemical, mechanical, thermal sparing of the gastrointestinal tract (hereinafter referred to as the gastrointestinal tract) with adequate nutrition;
- Reducing inflammation, improving ulcer healing;
- Normalization of secretory and motor functions of the stomach.
Characteristics: Mashed, boiled, steamed food. Take 5-6 times a day, milk and cream before bedtime.
Assortment: white bread, white crackers. Soups are milk, pureed, cereal and vegetable, except cabbage. Lean meats, skinless fish. Steamed food. Vegetable purees, porridges. Milk, cream, sugar, honey. Unsalted butter. Fruits in baked, pureed, boiled form.
Excludes: fresh bread, mushrooms, strong broths, borscht, eggs, chocolate, mustard, carbonated drinks.
Diet 1a
Prescribed for: a sharp exacerbation of gastric ulcer and 12 PCs in the first 5-7 days of treatment, a sharp exacerbation of chronic gastritis, acute gastritis on the 2-4th day of treatment.
Goal: Maximum chemical, mechanical, thermal gastrointestinal reduction of inflammation, improvement of ulcer healing, provision of nutrition during bed rest.
Characteristics: limit table salt to 5-7 g. Mashed, boiled, steamed food. Diet: 6 times a day, milk at night.
Assortment: mucous soups from cereals with butter, milk soups from cereals. Lean meats, skinless fish, steamed once a day. Steam omelet, milk, cream, liquid porridge. Kissels and jelly. Weak tea with milk, juices diluted with water, rosehip decoction.
Excludes : fresh bread and flour products, vegetable fiber, spicy snacks, raw fruits, confectionery, chocolate, mustard, gas. beverages.
Diet 1b
Prescribed for: gastric ulcer and 12 PCs, chronic gastritis in the subsiding stage, after diet 1a.
Goal: Maximum chemical, mechanical, thermal gastrointestinal reduction of inflammation.
Characteristics: Mashed, boiled food. Take 6 times a day, milk before bed.
Assortment: white crackers. Slimy pureed soups with cereals, milk soups with pureed. Lean meats, skinless fish. Steamed food. Vegetable purees, porridges. Milk, cream, sugar, honey. Steam omelette, butter in dishes. Fruits in baked, pureed, boiled form.
Exclude: strong broths, spices, spicy snacks, coffee, cocoa, mushrooms, excessively hot and cold dishes, gas. beverages.
Diet 2
Prescribed for: chronic gastritis with secretory insufficiency, mild exacerbation of gastritis during the recovery stage, acute gastritis, enteritis, colitis during the recovery period.
Goal: to provide adequate nutrition, moderately stimulate secretory and normalize the motor function of the gastrointestinal tract.
Characteristics: physiologically complete diet with moderate stimulation of secretion and chemical stimulation of the digestive organs. Food is boiled, stewed, baked, fried without a rough crust. Diet: 4-5 times a day without large meals.
Assortment: white bread, yesterday's bread, savory cheesecakes with cottage cheese, pies with boiled meat and eggs. Lean meats, boiled, baked, fried without breading. Kefir, fresh cottage cheese, yogurt, soufflé, puddings, cheesecakes. Various porridges in water with the addition of milk, in meat broth. Vegetables boiled, stewed, baked, or pureed. Juices diluted with water, rosehip decoction, bran. Butter and vegetable oil for dishes. Exclude: pea soup, fatty meats, hard-boiled eggs, legumes, cheeses, raw vegetables, radishes, cucumbers, spicy snacks, peppers, wine.
Diet 3
Prescribed for: chronic intestinal diseases with constipation during exacerbation or remission.
Goal: normalization of impaired intestinal functions and metabolic processes associated with these disorders.
Characteristics: a physiologically complete diet that includes foods rich in plant fiber and enhances intestinal motor function. In the morning, cold water with honey or juice of fruits and vegetables, at night kefir, prunes.
Assortment: wheat bread made from wholemeal flour, soups with weak broth. Lean varieties of meat and fish. Fresh cottage cheese and dishes made from it, omelet, crumbly porridge, cheese, boiled vegetables, limited potatoes. Salads, mild cheese. Fruits, berries, marshmallows. Butter and vegetable oil for dishes.
Excludes: butter dough, fatty meats, fish, radishes, radishes, garlic, turnips, mushrooms, spicy dishes, smoked meats, jelly, chocolate, products with cream, hot fatty sauces, strong tea, coffee.
Diet 4
Prescribed for acute enterocolitis, exacerbations of chronic colitis during the period of profuse diarrhea, severe dyspeptic symptoms.
Characteristics: a diet that is chemically, thermally, and mechanically gentle on the intestines. Meals 5-6 times a day, salt up to 8 g.
Assortment: white bread crackers, weak soups, cereal infusions, vegetable infusions. Lean meat minced, boiled or steamed. Porridges and puddings made from pureed cereals in water or low-fat broth. Soft-boiled or steamed eggs. Butter per serving 5 g. Limit sugar to 40 g.
Excludes : whole milk, cream, vegetable fiber, spices, spicy snacks, pickles, smoked meats, legumes.
Diet 5
Prescribed for : acute hepatitis and cholecystitis during the recovery period, chronic hepatitis and cholecystitis, liver cirrhosis.
Characteristics: maximum liver sparing. Limiting animal fats.
Assortment: wheat and rye bread from yesterday. Soups from vegetables, cereals, pasta. Lean varieties of meat and fish. Vegetables and greens in raw form. Fruits, berries, except sour ones. Milk, curdled milk, kefir, omelet 2 times a week.
Excludes: mushrooms, spinach, sorrel, lemon, spices, cocoa, strong broths, garlic.
Diet 5a
I prescribe for: acute diseases of the liver and biliary tract with concomitant diseases of the stomach, intestines, acute and chronic pancreatitis in the acute stage.
Characteristics: maximum sparing of the liver, gastric and intestinal mucosa. Limiting animal fats.
Assortment: dried wheat bread. Slimy soups from vegetables, cereals, noodles in vegetable broth, milk, pureed puree soups. Porridge, eggs only in dishes, sugar, honey, jelly.
Exclude: mushrooms, spinach, sorrel, lemon, spices, cocoa, strong broths, fatty meats, garlic.
Diet 6
Prescribed for gout and urolithiasis.
Goal: normalize purine metabolism, reduce the formation of uric acid and its salts in the body, shift the urine reaction to the main side.
How does infection occur?
First of all, in close contact with people with lice, when communicating in kindergartens, schools, camps, in crowded transport, when using shared clothing, bedding, bedding, hats, combs and other personal items. Infection of pubic lice in adults occurs through intimate contact, and in children - from adults caring for them, as well as through underwear.
Methods of combating head lice in hospitals and medical institutions
How to treat: folk remedies
Various folk methods have proven themselves in effective disinfection against lice.
For disinfection, you can use vinegar, tar or laundry soap. These products are used both for cleaning and clearing the apartment of lice and nits, and for treating the scalp of infected family members
To repel parasites, various herbs are used, such as tansy, peppermint, wormwood, and eucalyptus. They can be placed under the carpet, on sofas. The baseboards are wiped with a vinegar solution. A mixture of salt and soda is used to wipe upholstered furniture.
Parasites do not tolerate strong odors, such as garlic or citrus skins. To do this, crushed products are laid out in small quantities around the room. However, such a measure can only be regarded as preventive.
